Saturday, 14 January 2012

Body Painting - Intorduction

- Body Painting goes back to tribal traditions and it still widely used today as a form of art, advertising and in competition (world body painting competition)

- It can be done with the bodies natural shapes.

- It can be done with water based paints = aqua colour or oil based paints = super colour.

Carolyn Cowan does body painting tutorials on YouTube that we focused on during the lesson. First we practiced making strong, clean lines with aqua colours .

1


I did this with a large brush and used lots of paint to build up an opaque colour . I tried to make the lines as straight and neat as possible.

Next we practiced blending the colour together using different methods. We dragged one colour to the next going in the same direction, we dragged the two colours downwards to soften them into eachother and we used a sponge to stipple the two colours together


My favourite method for blending was dragging the two colours together downwards along the line as I think this gave the most even blend and was the neatest. The others became a little muddy and messy. Dragging it down gave a good blend without going to far into the other colours.

The next thing we did was practise body painting with oil-based paints. We made four squares of colour with strong neat lines again.

2


We also practiced blending oil paints from white to black with an even gradient.


Another technique we practiced was layering oil paints on top of water and vice versa. The two can be layered if the underneath colurs are set ( water dried and oil based paint set with powder)
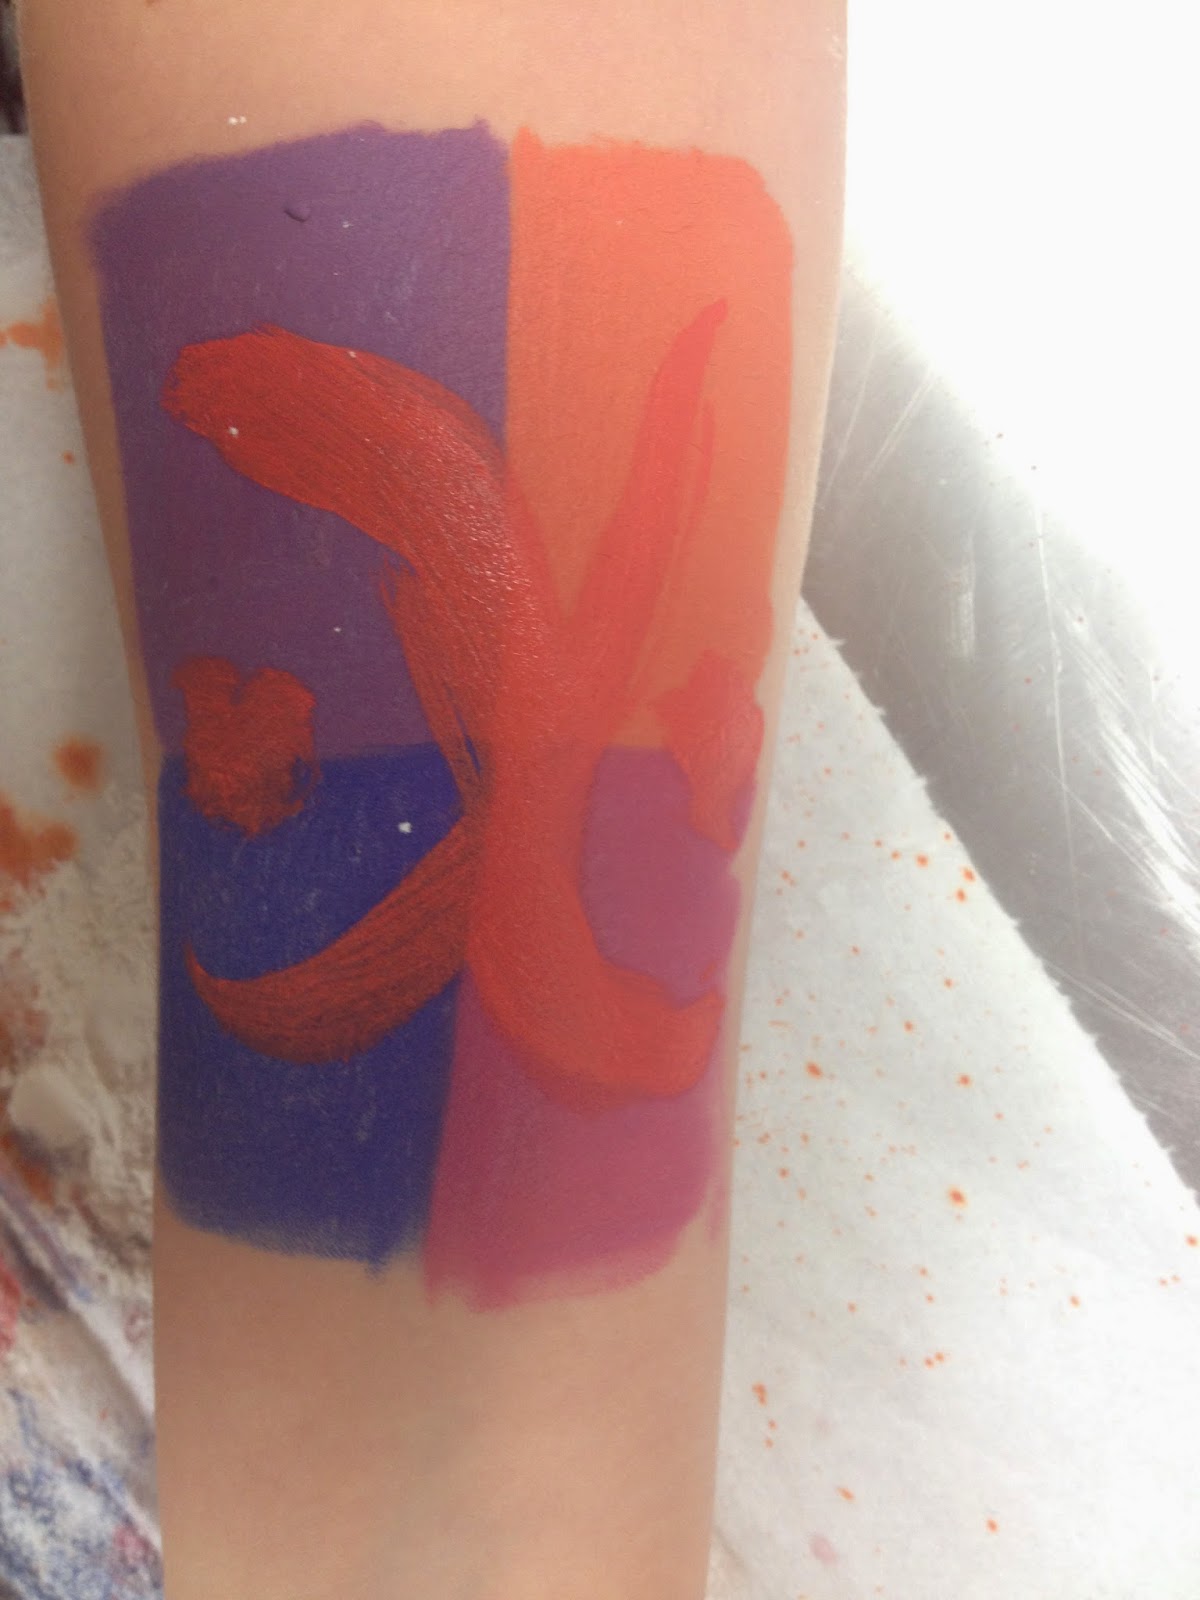

Next we looked at mixing paints with fullers earth to create textures in the body paint.

3

You can mix body paint, fullers earth and flour to create a smoother texture that cracks less or just fullers earth to get the cracked effect. We also looked at drawing patters in the paint when it's wet so they are fully in the paint when dry.


This is all the different textures that I experimented with using body paint and fullers earth.


This blue section is fullers earth and flour with blue painted on top and glitter sprinkled.


This section is an underpaint of orange body paint with fullers earth and flour on top. I then drew patters in the mixture which showed the orange colour underneath.


This section is just fullers earth straight on the skin with glitter sprinkled on top which stuck to it whilst wet. Unfortunately it took too long to dry so I didn't get a picture of it with all the fullers earth completely set.

 Evaluation

Overall I am happy with the experimentation I did for body painting. I had never done it before so I wanted to practice many techniques. I liked the straight lines I did for the water and oil based paints as I think they were very neat and looked good from afar. I was also pleased with the blend from white to black as although it was difficult to get it not to smudge and to get the full gradient of greys. Next time I would like the white to be more prominent and for the black to not smudge so far into it. The other experimentation with fullers earth and paints did not look so good but I got to practice a lot of techniques. I liked the drawing patters in the fullers earth and flour mixture and the painting over of the materials to make the colour pop more.

Sunday, 16 January 2011

Ginger Snaps Viewing

4


We viewed Ginger snaps in class and I made notes during the film through the lens of Gender/Sexuality as this interests me a lot and is along the lines of what I'd like to do for my project.

- 'Wrists are for girls' idea that an act can be feminine based on the fact that male acts are 'tough' or more difficult. Masculine is harder therefore better and they want to steer away from feminine things as they are associated with being weak - stereotyped gender roles

- We see the women playing sport from the male point of view. The first time the sisters come across as sexual is the camera being through the eyes of a male, idea that women's sexuality is based off men's desires.

- Girl called a 'bitch' because she rejects a boy. Negative connotations to girls who make own choices on sexuality.

- Can't talk about menstruating at dinner in front of man even though it's natural because society views it as a bad, taboo subject.

- Menstruating is a curse because it's a sign of women losing their innocence. Once a girl has her first period she is no longer pure and untouched. She is now 'dirty' and no longer innocent therefore something bad must happen to her. A punishment for the sin of womanhood (religious connotations in this - traditional values are still upheld)

- Man slays the beast whilst the girls run

- After she has her first period she wears tighter clothes, different hairstyles, sexuality begins to increase because her innocence is lost. All this is seen from the male perspective as she walks down the corridor in school.

- woman is overally sexual and the man sees it as uncomfortable and tells her to lie back. Society is uncomfortable with women being dominant sexually. 'who's the guy' = men should be dominant sexually and women should be submissive. The swapping of roles is uncomfortable and different. The werewolf could be seen as a metaphor for society being uncomfortable with women's owning their sexuality.

- Rape comment = women being overtly sexual, dressing in a certain way gives men the right and excuse to rape her? Another common view in society that girls 'asked for it'

- women are stereotyped as 'slut, bitch, tease or virgin next door'. We box in women's personalities to make them keep to what society thinks is best or make them feel guilty if they do otherwise.

- Very sinful act of killing is compared to masturbating  - something that society see's as sinful for a woman to do.

- Overly sexualised Halloween costume is again seen from the male perspective as she walks in the room.

- Younger sister takes positive action by the end - she's doing and he's encouraging. She's left as the last girl standing.

Saturday, 16 January 2010

Alien - Film Viewing

5
We viewed the 1979 film Alien in class. Again I viewed this film through the light of gender identities as this is what I will be focusing around for my project.

- Woman is asking to leave where they are exploring, men are persuading and making the decision to go on. Stereotypical gender roles of women as passive and men as aggressive and the decision makers.

- The least intelligent character is the first to die. Role of  'stupid' man to show the group what they're up against.

- Two clear women in film. One woman panicking and one woman being strong and giving instructions. Not much light and shade.

- Women viewed as sentimental when she goes back for the cat. Risks life for it - women are motherly and maternal and can't leave something helpless. Viewed as senseless and idiotic in the film.

- The man jumps infront of the woman to save her so he dies first - volunteer to die = brave

- The woman is clearly strong and capable against the alien but when she gets attacked by a man then other men have to save her.

 - She is the character that said the first man infected by the alien needed to be quarantined but no-one listened as she wasn't being compassionate and this was viewed as bad (especially as she is a woman) By then end we know that her decision would have been right all along. but it's not admitted by anyone.

- After she has first escaped she takes her clothes off which could be seen as belittling achievement as we see her sexually as a character after all she's done. When she first takled the alien she tied her hair up - a symbol of hiding her femininity to take on the masculine role of fighting. Once that's done we need to remember she's a woman so we see her in few clothes. Mirrors societies view that women can't just be clever/brave  without using their body as a tool. There is no need for her to be in her underwear as it doesn't add anything to storyline.

- When she needs to be empowered and take on a males role again she is in a spacesuit so her gender identity is more masculine again.

 - Afterwards she is back in skimpy clothing to reinforce her gender role - even though she's done something brave and strong to be a comfortable gender role as a woman she must then be seen as back in the place of nurturing the cat and being a 'woman'


Monday, 26 January 2009

Processing Silicone Prosthetics (using fiberglass) Part 1

 - Fiberglass is a strong lightweight material and is used for many products.

 - It is not as strong and stiff as carbon fiber but it's less brittle.

Health and Safety:

- Will irritate eyes, skin and respiratory system
- Potential dysphea, sore throat, hoarseness and coughing
- Safe to manufacture but have to wear protective clothing
- Mouth protection needs to filter against organic vapor (respirator)
- Hand protection (vinyl or nitrite gloves)
- Eye protection (any sort of goggles)
- Protective Clothing (baggy clothes so that it's away from skin if spills or overalls)

Materials:

- glass matting
- gel coat resin
- lay-up resin
- fine surface tissue
- catalyst (benzoyl peroxide)

Gel Coat = smooth, hard polyester surface coating of fiberglass stucture

Lay-up Resin = Synthetic Resin that undergoes polymerization during curing. Excellent adhesive, high strength, good chemical resistance.

Catalyst = methyl, ethyl, ketone peroxide

Glossary of terms:

- Core = thing sculpting onto (positive portion of a multipiece mold)
- Mould = the thing on top of the sculpt
- Cast = thing that comes out
- Flashing = excess material
- Touchdown = mould touching core
- Key = indentation to help alignment of mould
- Cutting edge = part of the mold that touches and glues thin edge
- Undercut = sculpting that creates a locking state between mould and core

Fiberglass:

- Gel coat is the first layer that goes on
- Laminating resin is a lot thinner and runnier than gel
- Chippings = little bits of fiberglass

- Vale = thin and papery fiberglass

- Catalyst is generally 2% of total volume (but can be different depending on atmosphere conditions) same for gel coat and laminating resin.


- Put mold release over plastic areas of core

- Talc the surface of the sculpt (prevents resin from building up)

- Add 2% of catalyst to gel coat layer (should change colour)

- With chip brush put an even layer of gel coat over entire sculpt and flashing and down onto core.


- Let almost cure (firm but tacky) usually takes 20-30 minutes (depends on room temperature

- Put 2% of catalyst in laminating resin

- Mix some resin with chipping and fill any deep holes that will be hard to fiberglass ( tight corners, flashing etc.)

- Wet up fiberglass chunks with resin.


- Lay over the sculpt, overlapping the pieces


- Use resin on the brush to put on top of fiberglass (knocking out airbubbles)

- Do 2 layers of fiberglass and a third round the edge for strength to pull apart.


- Lay the veil over the top and press down with resin


- Leave for a few hours to set and harden (preferably overnight)

Tuesday, 29 January 2008

Foam Latex (Part 1)


- In 100g of foam latex you've got 68g of latex - you need this and upwards to be good


- a 300g batch is essentially 300g plus all the other components

- the foaming agent is essentially soap


- You need 20% foaming agent to latex (eg. 100g latex = 20g foaming agent)

- The curing agent contains sulfur which gives the foam it's memory and sponginess


- Need 10% of curing agent to latex (eg. 100g latex = 10g curing agent)

- The gelling agent makes the foam set (so it get's put in at the end). There is no set percentage - depends on the temperature, humidity of area. Usually around 10% but in England more like 14%. In winter use more gel


- Once the foam is set it can be put in the oven on a different day - process doesn't need to happen all at once.

- First step is putting in mold release as otherwise piece won't come out. Only need mold release with porous materials (plaster) not non-porous materials (fiberglass)

- Advisable to write down every thing about environment each time make roam latex (amounts, temperature etc.) to know how to keep improving.

- You can add pigments to latex mix to pre-colour it but latex is opaque so can't work in colour layers like you can with silicone

- Can use acylic paint as a pigment, food colouring etc. Avoid colouring with copper in. Oil paints will ruin foam.

- To paint on top of latex you need pax paint ( oil paint, pros-aide), greasepaint or airbrush.

- Foam is extremely light compared to silicone.

- You can reinforce foam for a suit with netting/fabric (lycra, tight material) because foam grabs onto material well. You can then glue these materials onto core then put the latex on top.

- Oven needs to be hot before beginning

- Need bleeding holes in the mold so air can escape when material is being injected and you don't get air bubbles or trapped moisture. It also gives a visual reference to know how filled the mold is.

- 85/90 degree ovem for the foam

To run a foam mix:

- Put lines/markers on the mold so you know which way to fit it together

- Need a mixer, a timer and a thermometer

- Add mold release inside and outside mold

- 200g latex = 40g foaming agent

- Add this straight into the mix

- 20g curing agent

- Add into mix

- Full spin for 2-3 mins till 2-3x original size

- Slower speed to refine it for 8 mins

- Add 28g of gelling agent and whisk for another 30 seconds


- Paint thin layer into negative to catch all the detail

- Pour rest of mixture in and press two halves together

- For injection fill syringe with mixture and push into mold, waiting until overflow comes out. Plug the overflow holes.


- Can also be painted into flat plate molds.

- Can take 10 mins to 1/2 hour to set.

- Put into oven.

Flat Mold Piece 
Closed mold piece

Injection filled piece


Wednesday, 31 January 2007

Body Painting - Research

'The art of body painting covers a vast area of painted effects ... from a simple tattoo on the arm to the reproduction of a famous painting across an entire body or painting a model to look fully clothed' (Delemar 1995, pg. 77)

 - Delemar states that because the body painting process is very time consuming, it is essential to plan the designs on paper first then to experiment of a mannequin or model before the actual shoot.

 - The materials are special watercolours for the skin and a variety of sponges, brushes or any type of tool (including airbrushing) Stencils can be used to make repeat patterns, masking tape is good for a clean edge, natural or stipple sponges for stippling textures, feathers for marbling effects.

 - For painting clothes on the body i is best to use sable artists brushes, brushes and airburshing techniques

 - These are examples from the Delemar academy

6

7

8

9

One of the most famous body painters is Joanne Gair, 'Gair allows us to see the human body as a canvas to be transformed' (Gair EDDDIT)

 - As a girl she was fascinated by the Maori culture and the way their tribal heritage was identified by skin adornment.

 - She started orking as a makeup-artists and body painter in the 1980s, her self taught body painting skill making her portfolio stand out.

 - She became famous in 1992 when working with Annie Leibovitz and Demi Moore for Vanity Fair

 - In 1998 she began her long standing collaboration with Sports Illustrated for their swimsuit edition of the magazine

 - In 2003 she begun to experiment with photography as well as body painting.

10 - effect of dried mud being removed

11 - promoting cell phones

12 - clay, pigment and gold leaf 
13 - experiment recreating Victoria's Secret underwear

14 - Vanity Fair - wings drawn with ballpoint pen

15 - advertising job

16 - SOHO style magazine. Real creations ink and sharpie pens

17 - Sports Illustrated magazine

18

19

20 - recreation of Botticelli's Primavera

I think these images will help my body painting experimentation as they show examples of full artworks that have a purpose. I especially like the use of different textures and materials in Joanne Gair and I'd like to try using some different materials in my work.